Plesk, a widely used web hosting control panel, streamlines the management of websites and server resources. For those new to the platform, accessing Plesk control panel may seem like a simple task. In this comprehensive guide, we will walk you through multiple methods, ensuring that users of various hosting environments can effortlessly access Plesk and make the most of its powerful features.
What is Plesk Control Panel
Plesk is a web hosting control panel that provides a user-friendly and comprehensive interface for managing websites, domains, email accounts, server configurations, and other hosting-related aspects. It is designed to simplify the administration and automation of various tasks, allowing users to efficiently manage their hosting environment without requiring extensive technical expertise.

Methods of Accessing Plesk Control Panel
Accessing the Plesk control panel can be done through various methods, providing flexibility based on your hosting setup and preferences. Here are the primary methods:
Accessing Plesk Control Panel via Web Browser
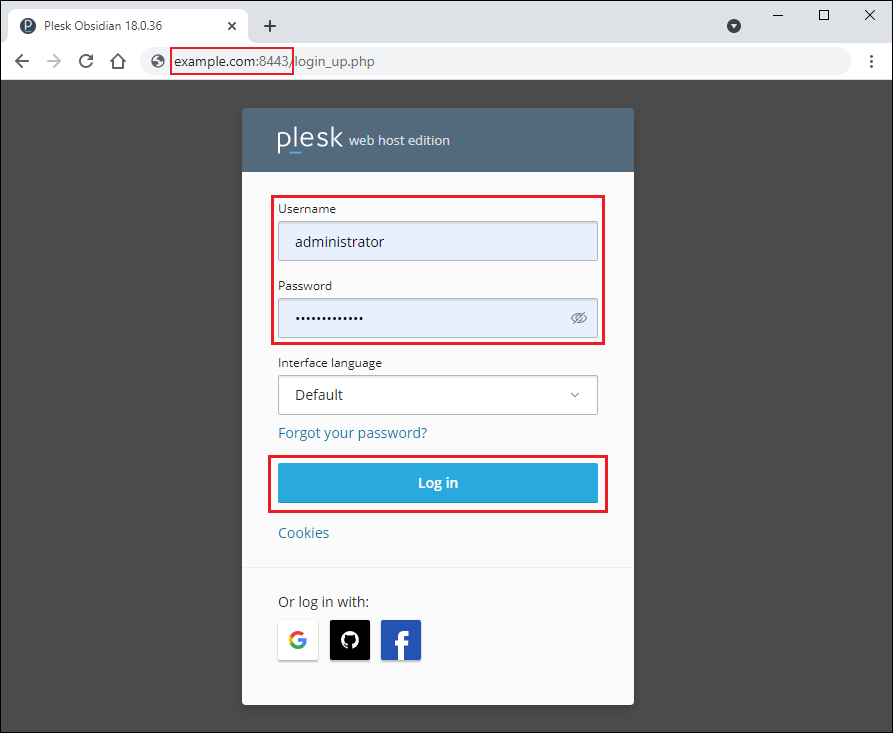
The most common way to accessing Plesk control panel is through a standard web browser. To begin, open your preferred browser – whether it’s Google Chrome, Mozilla Firefox, or Microsoft Edge. In the address bar, input the URL provided by your hosting provider, typically following the format: https://yourdomain.com:8443. This URL may differ, so consult your hosting provider for the correct information.

Once on the login page, enter the Plesk username and password provided by your hosting provider. These credentials are crucial for ensuring the security of your hosting environment. After inputting the required information, click the “Log In” or “Sign In” button to access the Plesk control panel. This straightforward method allows users to manage their websites, domains, and server settings with ease.
Accessing Plesk Control Panel via Direct IP Address
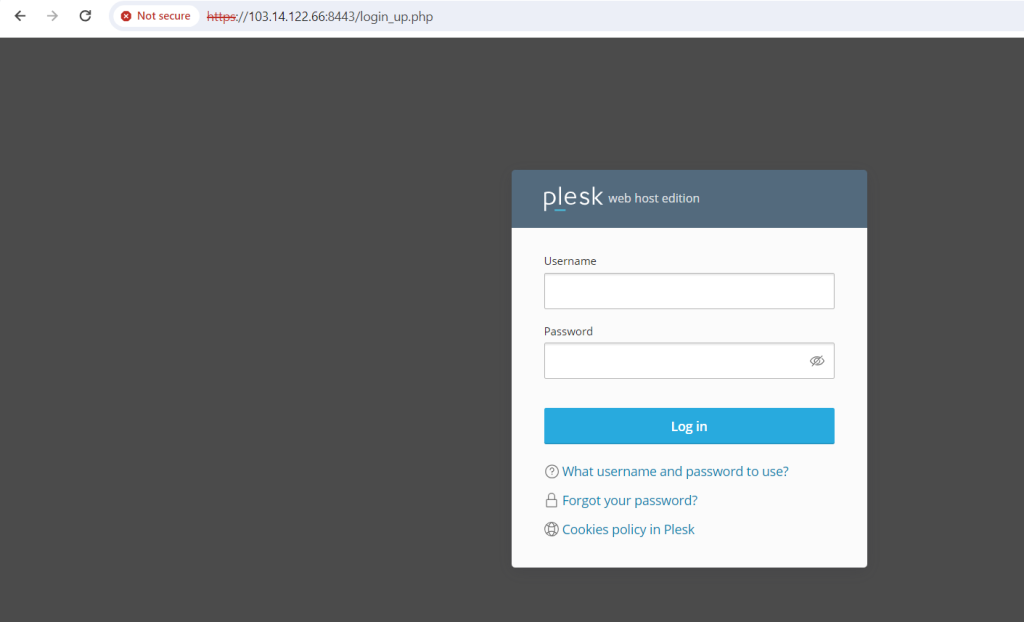
In some cases, hosting providers may offer a direct IP address for accessing Plesk. To utilize this method, open your web browser and enter the provided IP address in the address bar. The URL format will look like: https://yourserverip:8443. This direct approach bypasses the need for a domain name.

Upon entering the IP address, you will be prompted to provide your Plesk username and password. These login credentials act as a protective layer for your hosting environment. After successful authentication, click the “Log In” or “Sign In” button to access the Plesk control panel. This method is particularly useful when a domain name is not yet configured or for those who prefer using an IP address for direct access.
Accessing Plesk Control Panel via Plesk Mobile App
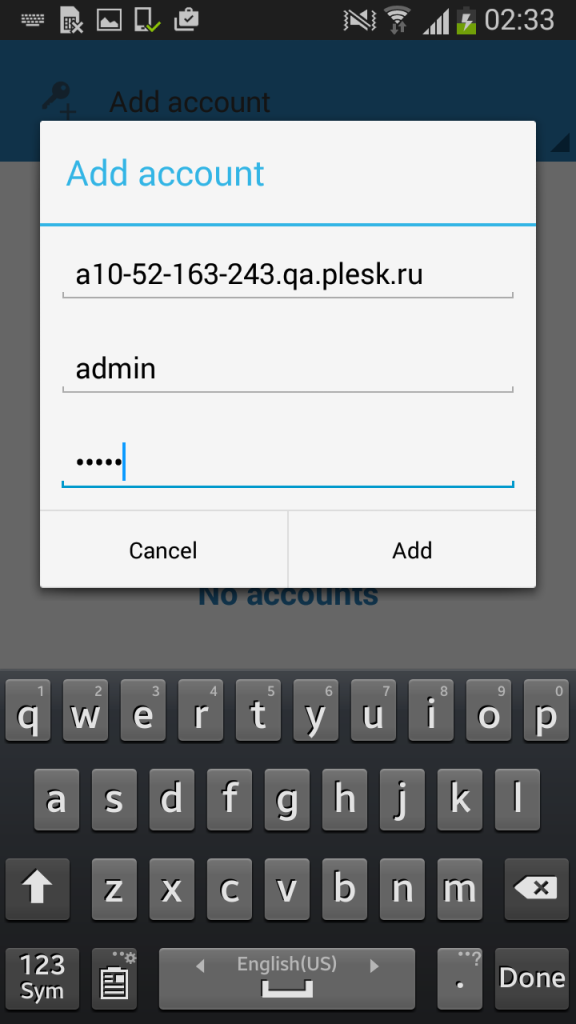
For users on the go, the Plesk Mobile app provides a convenient way to access the control panel from your smartphone or tablet. Begin by downloading and installing the app from your device’s app store. Once installed, open the app and add a server by entering the server address, port (usually 8443), and your login credentials.

After adding the server details, tap to connect, and you’ll have access to the Plesk control panel from your mobile device. This method is ideal for those who need to manage their hosting environment while away from their desktop or laptop. The Plesk Mobile app provides a user-friendly interface, allowing users to monitor and control their websites and server resources with ease.
Conclusion
In conclusion, accessing the Plesk control panel is a fundamental step in effectively managing your web hosting environment. Whether through a web browser, direct IP address, or the Plesk Mobile app, users can choose the method that best fits their preferences and hosting setup. By following the steps outlined in this comprehensive guide, users can confidently navigate the Plesk control panel, unlocking its full potential for website and server management.


