Table of Contents
Step 1: Choose a Domain Name and Hosting Provider
- Domain Name: Choose a name that reflects your blog’s purpose or niche. Keep it short, memorable, and easy to spell.
- Hosting Provider: You’ll need a hosting provider to store your blog’s files and make it accessible online.

Step 2: Purchase Hosting and Register Your Domain
- Once you’ve selected a hosting provider, purchase a hosting plan. For beginners, a basic shared hosting plan is usually enough.
- Most hosting providers also allow you to register your domain name during the signup process.
- Ensure that your hosting plan includes SSL (Secure Sockets Layer), which is essential for securing your site and is favored by search engines.
Step 3: Install WordPress
- After setting up your hosting, log in to your hosting dashboard.
- Look for a 1-click WordPress installation option (most hosts provide this).
- Choose the domain where you want to install WordPress and follow the prompts to complete the installation.
Step 4: Log Into WordPress

- Once installed, you can log in to your WordPress dashboard.
- Navigate to
www.yourdomain.com/wp-adminand enter the login credentials you created during installation.
- Navigate to
- This dashboard is where you’ll manage everything related to your blog, from posts to themes and plugins.
Step 5: Choose a WordPress Theme
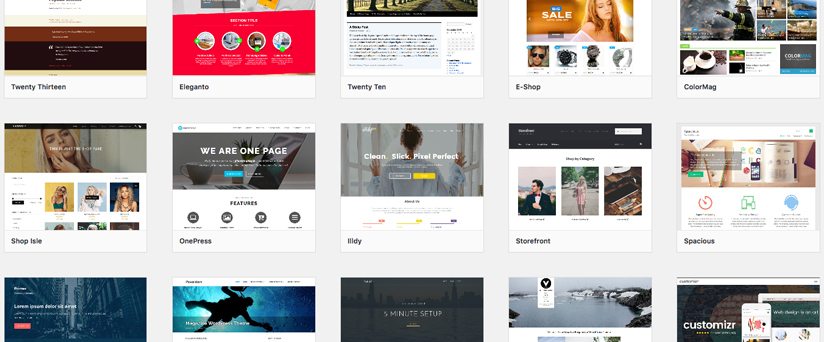
- WordPress comes with a default theme, but you can change it to better suit your style.
- Navigate to Appearance > Themes and click Add New. Browse through the free themes or upload a premium theme if you purchased one.
- Popular free themes for beginners include Astra, OceanWP, and GeneratePress.
- Once you’ve found a theme you like, click Install, then Activate.
Step 6: Customize Your Theme
- Go to Appearance > Customize to adjust your theme’s settings. Here you can:
- Add a logo
- Change site colors
- Set fonts
- Edit the header and footer
- Many themes come with drag-and-drop page builders (like Elementor) that make customization even easier.
Step 7: Install Essential Plugins

- Plugins add additional functionality to your WordPress blog. Here are some essential plugins for beginners:
- Yoast SEO: Helps you optimize your posts for search engines.
- WPForms: Create contact forms for your blog.
- Akismet: Protects your blog from spam comments.
- UpdraftPlus: Backup your site regularly to avoid losing content.
- Smush: Optimizes your images for faster load times.
- To install plugins, go to Plugins > Add New and search for the plugin by name, then click Install and Activate.
Step 8: Create Essential Pages

- Every blog needs a few basic pages. Start by creating:
- Home Page: This is the first page visitors see. It can feature your latest posts, a welcome message, or a custom design.
- About Page: Share your story, introduce yourself, and explain what your blog is about.
- Contact Page: Add a contact form so readers can get in touch with you. You can use WPForms to easily add a form.
- Privacy Policy Page: Essential for legal compliance, especially if you collect user data.
To create a page, navigate to Pages > Add New, and start creating your content.
Step 9: Write Your First Blog Post

- To publish your first post, go to Posts > Add New.
- Choose a compelling title and start writing your content in the WordPress block editor (also known as Gutenberg).
- Use the formatting tools to add headings, images, lists, and other elements to break up your content and make it visually appealing.
- On the right-hand sidebar, you can add categories and tags to help organize your content.
- Once you’re happy with your post, click Publish.
Step 10: Optimize Your Blog for SEO
- SEO (Search Engine Optimization) is essential for attracting visitors to your blog. Here’s what you should do:
- Install Yoast SEO (or a similar SEO plugin) and use it to optimize each blog post. Yoast will guide you on keyword placement, readability, and meta descriptions.
- Ensure your site has an XML sitemap (Yoast can generate one for you) and submit it to Google Search Console.
- Set up permalinks for your blog posts under Settings > Permalinks. Choose the Post Name option for clean and SEO-friendly URLs.
Step 11: Set Up Google Analytics

- Google Analytics helps you track your blog’s traffic and user behavior.
- Sign up for a Google Analytics account, then install the MonsterInsights plugin to easily integrate Google Analytics with your WordPress blog.
- This plugin allows you to see key metrics right from your WordPress dashboard.
Step 12: Enable Caching for Better Performance
- To speed up your blog, install a caching plugin like W3 Total Cache or WP Super Cache.
- Caching stores a static version of your website, allowing it to load faster for returning visitors.
Step 13: Launch Your Blog

- Before launching, review your site to ensure everything looks good. Check all your pages, links, and make sure your blog posts are formatted correctly.
- Once you’re satisfied, you can start promoting your blog through social media, email newsletters, and by networking with other bloggers.
Step 14: Promote Your Blog

- Share your blog posts on social media platforms like Facebook, Twitter, Instagram, and Pinterest.
- Consider using email marketing tools like Mailchimp to build an email list and send updates to your subscribers.
- Engage with other bloggers in your niche by commenting on their posts and sharing their content.
By following these steps, you’ll have a WordPress blog up and running in no time. Blogging requires consistent effort, but with the right setup, you’re well on your way to creating a successful blog!