Backup Your Website Files and Database – Manually backing up your website files and database is a crucial task to ensure that you have a copy of your website’s content and data in case of emergencies, such as server failures, hacking attempts, or accidental data loss. Below are the general steps to manually back up your website files and database:
Table of Contents
Website Files Backup:
- Access Your Website Files:
- Use an FTP (File Transfer Protocol) client like FileZilla or access your hosting control panel’s file manager.
- Navigate to Your Website’s Root Directory:
- This is typically named
public_html,www, or similar.
- This is typically named
- Select All Website Files:
- Highlight all files and folders in your website directory.
- Download Files:
- Download the selected files to your local computer. You can drag and drop them from the remote server to your local machine using the FTP client.
- Verify Backup:
- Once downloaded, ensure that all files are intact and successfully copied.
Database Backup:
- Access Your Database:
- Log in to your hosting control panel or use a tool like phpMyAdmin to access your website’s database.
- Select Database:
- Choose the database associated with your website from the list.
- Export Database:
- Look for the “Export” option and select it. You will be presented with various export options.
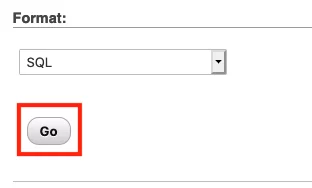
- Choose the export method (e.g., Quick, Custom) and select the format (usually SQL).
- Optionally, you can customize export settings such as including table structure, data, etc.
- Download Backup File:
- After configuring the export settings, click on the “Go” or “Export” button to initiate the backup process.
- Save the exported SQL file to your local computer.
Final Steps:
- Verify Backups:
- Ensure that both the website files and database backup files are successfully downloaded and saved.
- Store Backups Securely:
- Keep backup files in a secure location, preferably offline or on a separate server, to prevent loss in case of server issues or hacking attempts.
- Regular Backup Schedule:
- Set up a regular backup schedule, depending on how frequently your website content changes.
- Test Restorations:
- Periodically test your backups by restoring them to ensure they are functional and contain the required data.
By following these steps, you’ll have a manual backup of your website files and database, which can be crucial for restoring your website in case of unforeseen circumstances. Additionally, some hosting providers offer automated backup solutions that can complement your manual backups for added security and convenience.
Manually backing up your website files and database offers several advantages:
- Control and Flexibility: Manually backing up your website files and database gives you full control over the backup process. You can customize the backup frequency, file formats, and storage location according to your specific requirements.
- No Dependency on Third-Party Tools: Manual backups eliminate reliance on third-party backup tools or plugins, reducing the risk of compatibility issues or vendor lock-in. You can use standard protocols and tools like FTP and phpMyAdmin, which are widely supported by most hosting providers.
- Cost-Effectiveness: Manual backups typically do not incur additional costs since they rely on tools and services already provided by your hosting provider. This can be advantageous, especially for individuals or small businesses with limited budgets.
- Enhanced Security: By manually backing up your website files and database, you can ensure that sensitive data remains within your control. This reduces the risk of data breaches or unauthorized access associated with third-party backup solutions.
- Customization and Granular Backup: Backup Your Website Files and Database allow for customization and granular backup options. You can choose to back up specific files or directories, exclude unnecessary data, and optimize the backup process based on your website’s structure and requirements.
Follow these steps to manually backup your website files and database:
Part 1a — Backing up the Website Files
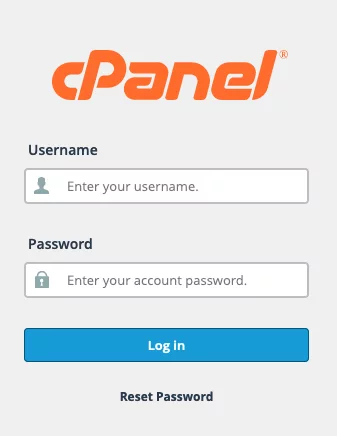
1. Log in to your cPanel account.
2. Under the Files section, click File Manager.

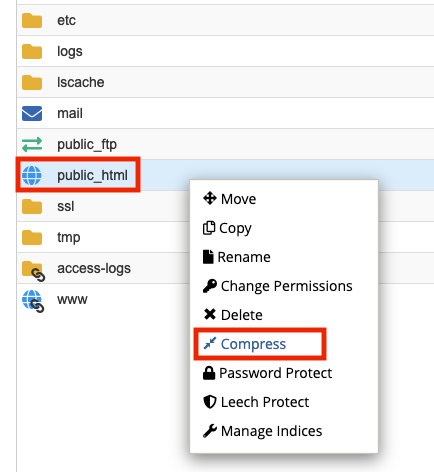
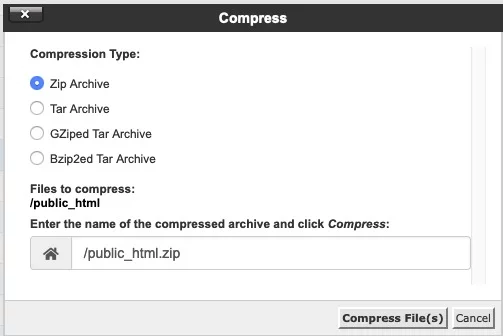
3. You want to zip up the folder where your website files are contained (most commonly in the public_html folder). Right-click the folder you wish to zip up, then click Compress. A pop-up will appear, select Zip Archive, then click Compress File(s).
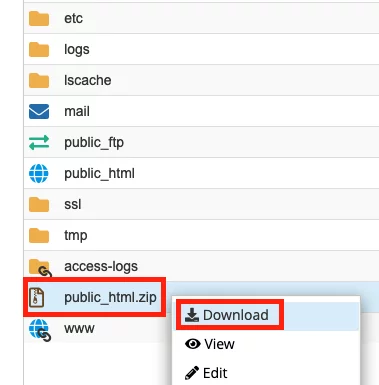
4. Once the folder has been compressed, right-click the compressed zip file, then click Download.
Part 1b — Backing up the Database
1. Log in to your cPanel account.

2. Under the Databases section, click phpMyAdmin.

3. Select the correct database associated with your website.

4. Click Export.

5. Click Go and save the file to your computer.
